
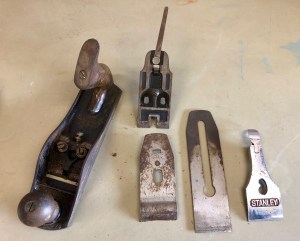
My aim is get started on a workbench shortly so I decided to invest in a plane. Having never owned one previously I just looked for a name I recognised on eBay (in this case Stanley) and started there.
It set me back £10 plus a couple of pounds for p&p which I think is a pretty reasonable price. The description on eBay suggested it would need some work when it arrived, but to my mind, it looked like it was in pretty good condition. There is a little bit of rust on the iron itself, and the handles need sorting but the sole looked flat and otherwise it was just a bit dirty.

I started by removing the blade and frog from the plane but left the handles on for the time being so I had something to hold when cleaning the sole. I then gave each of the pieces them a going over with a stiff brush to remove the loose dirt etc. For the more stubborn grime/corrosion I would need sandpaper to really remove the grime that had built up over the years…
Cleaning
I started on the sole of the plane but needed a really flat surface on which to work along with various grades of sandpaper so I grabbed the following new bits of equipment:
- Veritas Glass Lapping Plate: https://www.axminster.co.uk/veritas-glass-lapping-plate-476783 (£13.99)
- 250 grit sandpaper: https://www.amazon.co.uk/Faithfull-115mm-Aluminium-Oxide-Paper/dp/B003Y3XGRO (£7.06)
- 800 grit self-adhesive sandpaper: https://www.axminster.co.uk/hermes-self-adhesive-abrasive-film-800-grit-951276 (£8.50)
- 1200 grit self-adhesive sandpaper: https://www.axminster.co.uk/hermes-self-adhesive-abrasive-film-1-200-grit-502727 (£7.99)
All in all, a bit more than I had originally intended to spend but I know I am going to need to do some regular sharpening and this should keep me going for a little while. Given a little patience it could be done a lot cheaper as well… any piece of glass should do the trick I would have thought (though I guess toughened glass would be the sensible option) and in retrospect I didn’t require the self adhesive sandpaper.
In fact, on that note, I made the mistake of sticking the sandpaper to the glass at first. Whilst this worked well for the sharpening process, once removed, it left a sticky residue on the glass and in fact left bumps that could be felt under the next piece of sandpaper – so it was no longer flat!
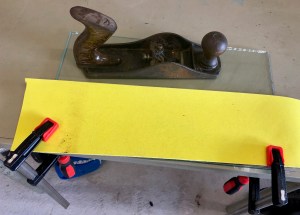
In the end I used some small clamps to hold the sandpaper to the glass and began to flatten and clean the sole of the plain on the 120 grit paper. It didn’t take long to see some improvements and so I did the same to the sides of the plane as well. It’s worth noting, this process produces quite a bit of mess. Gloves are recommended.
Once done on the 120 grit I repeated the process with the 800 grit and finally the 1200. The same process was then done on the frog but I didn’t touch the ‘Stanley’ branded holder as that appeared to be chrome plated and although it had a couple of chips I thought better to leave it alone.

I then cleaned the iron by holding it flat on the paper and running through the same motions.
Sharpening
To sharpen the blade bought a honing guide to help maintain the proper angle on the iron.
- Honing Guide: https://www.amazon.co.uk/Draper-12400-3-67-Honing-Guide/dp/B0001K9OMY (£6.54)
As you might have guessed by now, sharpening of the blade was exactly the same process, 3 grades of paper, but with the addition of an added final step of honing compound and leather strop. I happened to have these two in my collection already (after dabbling with whittling a few years prior – without much success).

To hone on the strop, I rubbed the honing compound into the leather and ran the sharpened blade down the leather a couple of dozen times, leaving a much sharper and polished blade.
Handles
The rear handle was a little loose even with the screw firmly tightened. I started by removing both handles and used a hacksaw to remove a couple of millimetres off the end of the shaft to shorten the length. Now when tightened, the handle held much firmer.

I used the edge of a cheap (and very blunt chisel) to scrape off the old lacquer and gave the handles a sand with the 120 paper. I had some wood stain in the cupboard which I should probably should have thinned down a little before using but it looked ok after applying and re-attaching to the plane. I didn’t want to scratch the brass screws holding the handles any more than they already were so I just rubbed them clean with a cloth, reattached the handles and left it at that.
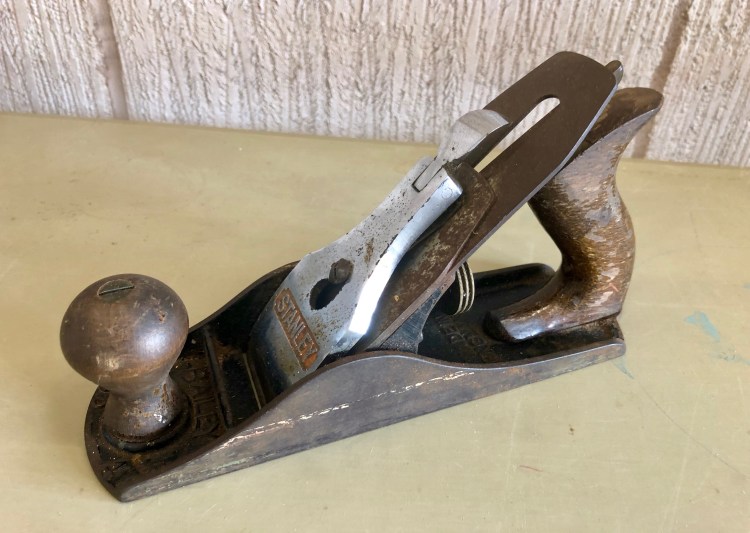
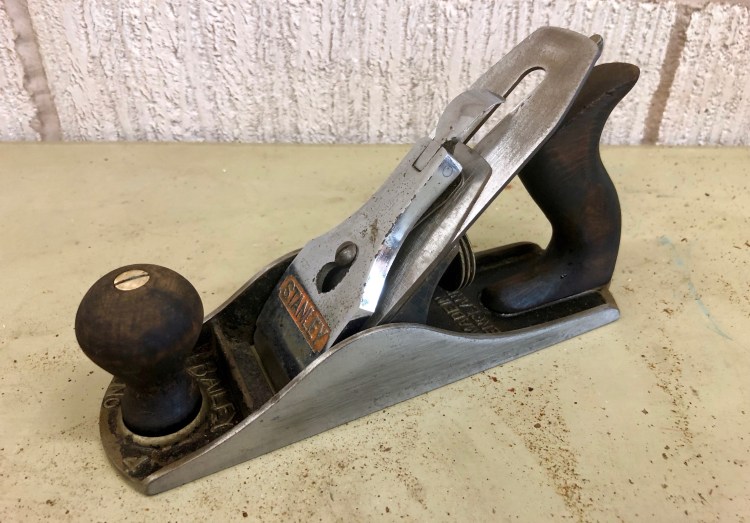
All in all, it’s not a staggering transformation, but it’s gone from a dirty and very blunt plane to something useable in a short space of time.

One thought on “Bench Plane Restoration”